Let’s face it, we’ve all landed in a situation where we accidentally sent a sensitive email to the wrong recipients. In fact, according to Egress, 91% of organizations have encountered outbound email security issues at one time or another.
If you’re using Outlook, though, you may be able to recall it. But first, you have to know how to recall an email in Outlook.
You’ll need a desktop Outlook 365 client for this to work. Message recall only works if you and the recipient both have Microsoft Office 365 or Microsoft Exchange and are working in the same organization. You can’t recall emails sent from Gmail or Hotmail.
Steps To Recall an Email in Outlook
Open the latest version of your desktop Outlook client and go to Home to get started.
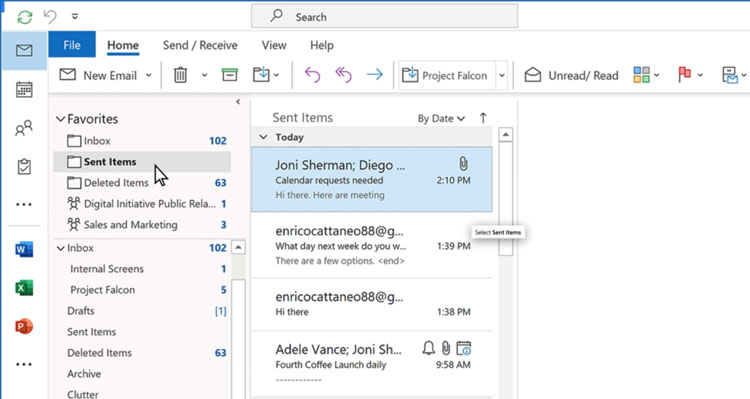
Step 1: Select the Sent Items folder from the dropdown menu on the left of your screen to view sent emails.

Open Outlook and click on Sent Items. Source
Step 2: Look for the email you want to recall and double-tap on it. This will open the Outlook message in a new window.

Open the message you want to recall in a new tab. Source
Step 3. Go to File and select Info.
Step 4: From the dropdown menu, select Message Resend and Recall and click on Recall This Message.
Alternatively, you can go to the Message Tab > Actions > Recall This Message if you have the Classic Ribbon.

Select Recall This Message from the Actions dropdown menu using the Classic Ribbon. Source
If you have Simplified Ribbon or the classic Outlook, go to the Message tab > More Commands (…) > Actions > Recall This Message.

Go to More Commands (…) > Actions > Recall this message using the Simplified Ribbon. Source
Step 5: Now, a pop up window will appear on the screen. You’ll see two options:
- Delete unread copies of this message.
- Delete unread copies and replace with a new message.
Select the first one to recall your original message or the second one to recall and replace it with another message.

Select one of the two options. Source
Step 6: Check the box for Tell me if recall succeeds or fails for each recipient located below the options.
Step 7 Press OK.
The message will be deleted, and if you opt to replace it, the revised message will be sent.
Step 8: Check the confirmation notification to know the status of the recalling process.

Recalling email confirmation notification. Source
Why Can’t I Recall an Email?
Unfortunately, email recall has a very low success rate to date.
Ensure that you update your Outlook desktop clients regularly, as it’s necessary for the recall feature to work. Apart from that, we’ve put down some reasons that might prevent you from recalling an Outlook email:
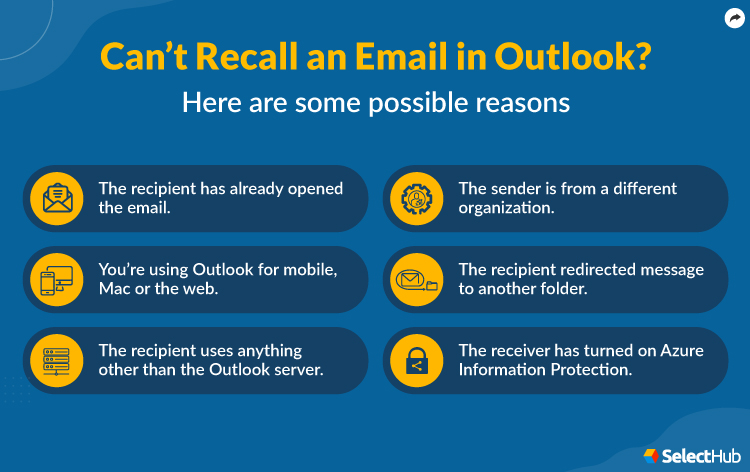
- If the email recipient has already opened it, you won’t be able to recall the message. However, in this case, you can request them to disregard the message, but it will remain in their inbox.
- If you’re using Outlook for mobile, Mac or the web, you can’t access the recalling feature. It’s only available to users of desktop apps for Windows.

- If the recipient uses Yahoo, Apple Mail, Hotmail, Gmail or anything other than Exchange (Microsoft) or Outlook server, recalling won’t work.
- You won’t be able to replace or recall Outlook mail if the recipient is from a different organization. Both of you have to be on the same server to be able to access this feature.
- If the recipient has redirected the message through the filter to another folder without opening, it can’t be recalled.
- If the recipient has turned on Azure Information Protection. This application prevents you from recalling a sent email.
Steps To Add an Email Delay
The people you send emails to won’t always be using Outlook 365 or Microsoft’s mail clients — or work at the same company as you, for that matter. From Google Mail to custom mail clients, there are various email solutions out there.
With that in mind, here’s a more proactive alternative to help you avoid the need for email recall.
Delay a Single Email
Here are the steps to delay an individual email before sending it:
Step 1: Click Options on the message editing tab at the top of your screen.
Step 2: Select Delay Delivery from the dropdown menu.
Step 3: Check the Do not deliver before box and set the delivery date and time you want in the properties box.

Delay individual emails in Outlook. Source
Step 4: Check the Save copy of the sent message box if it’s not automatically checked.
Step 5: After filling in the delivery date and time, hit Close to save changes.
This way, after sending a message, the email will stay in your Outlook folder until the scheduled time and date. You can recheck it and delete the email.
Delay All Emails
Delaying all your emails by a couple of minutes (or longer) can save you from needing an option like email recall. Here are the steps:
Step 1: Open Outlook.
Step 2: Head to File and select Manage Rules & Alerts.

Open File and click on Manage Rules & Alerts. Source
Step 3: Select E-mail Rules and click on New Rule.

Click on New Rule. Source
Step 4: The Rules Wizard box will appear. From there, select Start from a blank rule and choose Apply rule on messages I send.
Step 5: From the list of conditions, select the ones you want or skip them all and click Next.

Select the conditions according to your needs. Source
Step 6: Go to the Edit the rule description box and click on the hyperlinked text where it says Defer delivery by a number of minutes.
Step 7: Enter the minutes by which you want to delay the mail and select OK. The rule will be set.
Note: Before exiting, it’s better to check whether the new rule is working properly or not. Send some blank emails to check.
What Happens After Recalling
The result of an email recall in Outlook can vary from case to case. It usually depends on the email body, if it has been seen or read by the recipient, and several settings of the receiver’s email client. We’ve listed some of the possible outcomes after you initiate a recall action.
- When recalled, a recall message will land in the recipient’s inbox. If they open the recall request first, the original mail will be deleted. However, Outlook will inform the recipient that you’ve deleted your previous mail.
- If the recipient has turned on automatic replies to business emails (which they can do under the Tracking option) and didn’t get a chance to open the mail you sent, Outlook will delete it and send a notification to the recipient.
- One unique outcome is if the recipient moves the mail to a separate inbox or location. In that case, the recall will fail. Outlook will notify the recipient that the recall failed, and the original mail will stay with them.
Note: If you’re using Outlook 365 on a mobile device and initiate a recall, it’ll most likely fail.
When To Recall an Outlook Email
Recalling should be done only as a last resort. Besides, there’s no guarantee that you’ll succeed. Therefore, the better option is to revise all emails before hitting the send button, even if you’ve enabled the email delay feature. However, if you’ve decided to recall an email, do it as soon as possible. That way, the chances of the recipient opening the email are less.
Here are a few reasons that might compel you to recall Outlook emails:
- Sending an email to the wrong person can be both embarrassing and awkward. Recalling enables you to correct your mistake by deleting the email.
- If you’ve sent a message with wrong information or erroneous data, consider recalling or replacing the email with accurate details.
- If you’ve sent a poorly constructed email with typos, it might be hard or impossible to understand.
- If you’ve unintentionally shared sensitive information, then immediately recall the message and resend another email.

