It’s been more than 6 years since I wrote an original version of this prime table generator. That was back at the very beginning of my coding career, after learning C and SDL in the first semester of university. An archived version of that original project is available here, including the sources, 120 lines of excellent C code.
Premise
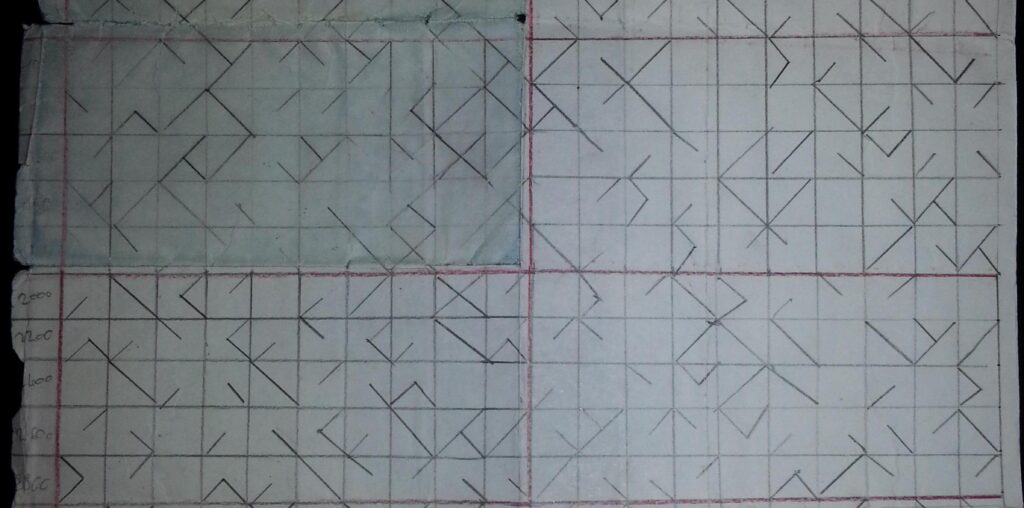
Recapping from the article linked above briefly: the point of this project is to create a visually pleasing and concise representation of prime numbers. The original, on-paper version contained prime numbers up to 4000, and looked like this:

How does it work? Each square represents a block of ten numbers. Since primes (above 2) may only end on the digits 1, 3, 7, or 9, each corner of the square can indicate whether or not a given ending digit is a prime within the 10 number wide block.
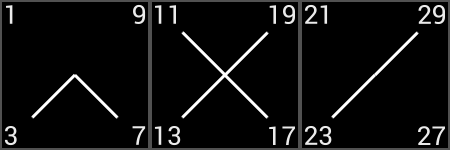
As an example, the third block of the table corresponds to the numbers 21-30, and the two connected corners indicate that only 23 and 29 are primes within this range.
Now, let’s get to coding this for Android!
You can find the code for the completed project on GitHub.
Creating a grid
In the previous Jetpack Compose article on this blog, we created an animated clock with a bottom-up approach. This time, we’ll design things top-down, and start with rendering a grid in Compose. For this, we’ll use the experimental LazyVerticalGrid APIs.
@OptIn(ExperimentalFoundationApi::class)
@Composable
fun Primes() {
    LazyVerticalGrid(
        modifier = Modifier // 1
            .fillMaxSize()
            .background(Color(0xFFE53935))
            .padding(8.dp),
        cells = GridCells.Fixed(10), // 2
    ) {
        items(count = 100) { // 3
            Box(
                Modifier // 4
                    .aspectRatio(1f)
                    .padding(1.dp)
                    .background(Color.DarkGray)
            )
        }
    }
}
Breaking down the code above:
- The
LazyVerticalGridcomposable fills the entire screen, has a red background, and a small bit of padding. - It displays a grid with a fixed number of columns.
- The grid contains 100 items.
- Each item is a simple
Boxfor a start, which is constrained to be a square shape, has a bit of padding, and a dark background colour.
Note how we had to opt-in to using the experimental API with the
@OptInannotation, which also requires some additional project-level configuration to enable it. You can read more about this language feature in Mastering API Visibility in Kotlin.
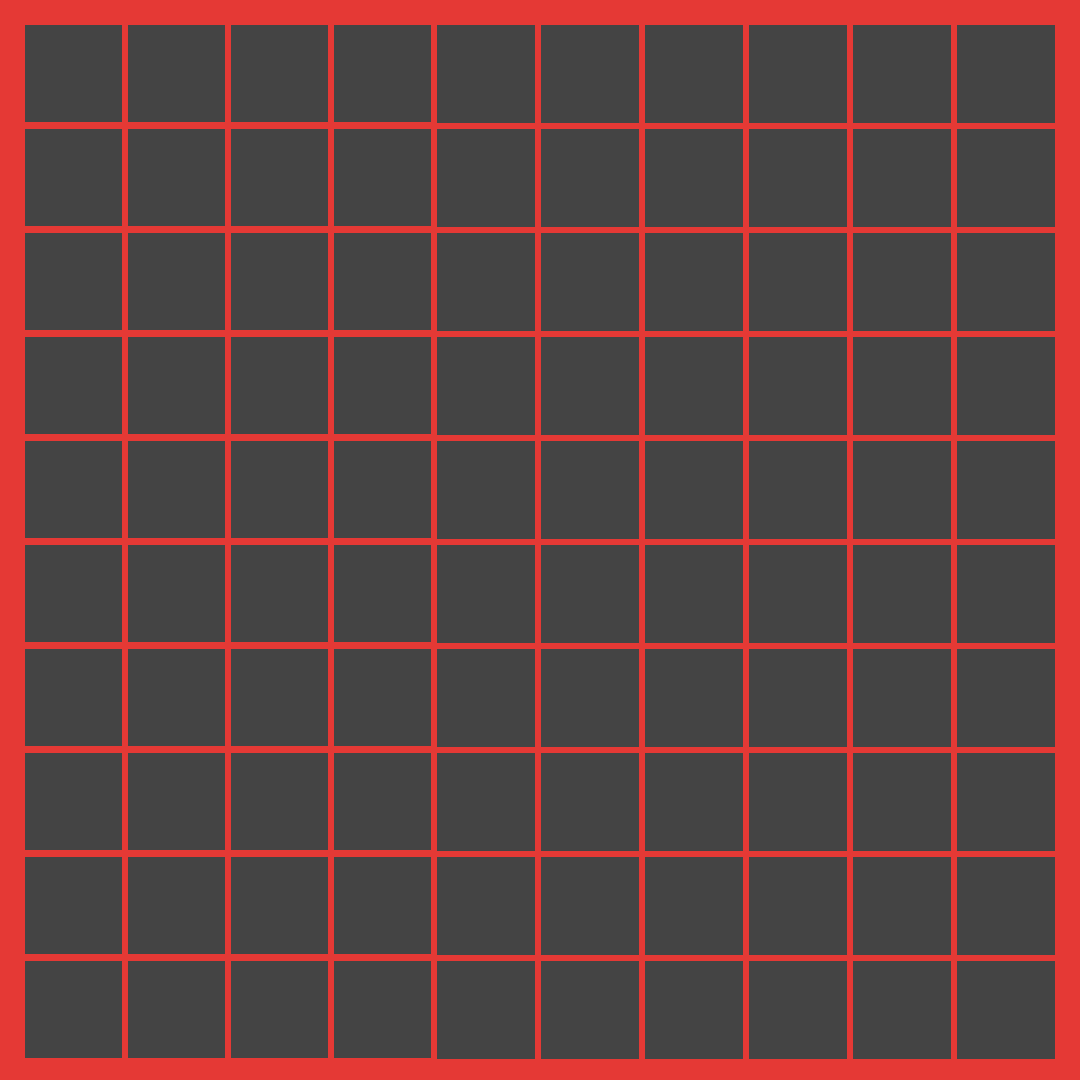
Running the code above renders the (scrollable) grid of squares:
A single square
Let’s refactor this a bit, and create a PrimeSquare composable for each item of the grid. This will receive the current offset that it should render prime numbers for.
@OptIn(ExperimentalFoundationApi::class)
@Composable
fun Primes() {
    LazyVerticalGrid(...) {
        items(count = 100) { index ->
            PrimeSquare(offset = index * 10)
        }
    }
}

@Composable
fun PrimeSquare(offset: Int) {
    Box(
        Modifier
            .aspectRatio(1f)
            .padding(1.dp)
            .background(Color.DarkGray)
    ) {
        CornerLine()
    }
}
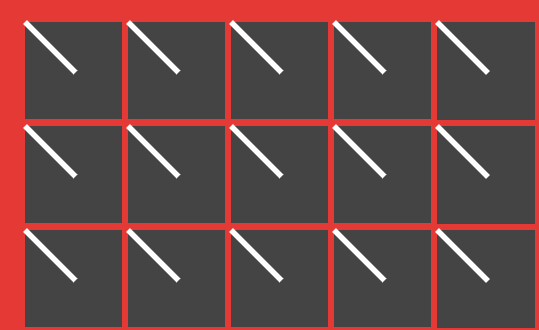
For the content of a single PrimeSquare, we’ll render just one line from the top left corner to the center, with our own CornerLine composable. We can do this in Compose using the Canvas API:
@Composable
fun CornerLine() {
    Canvas(Modifier.fillMaxSize()) {
        drawLine(
            color = Color.White,
            start = Offset.Zero,
            end = Offset(size.width / 2, size.height / 2),
            strokeWidth = 2.dp.toPx(),
        )
    }
}
This gives us the following look – a good start!
Rotating and stacking squares
To get this line into the correct corner, we can rotate the canvas while drawing on it. A simple rotate function call takes care of this for us. We’ll take the rotation amount as a parameter to CornerLine.
@Composable
fun CornerLine(degrees: Float) {
    Canvas(Modifier.fillMaxSize()) {
        rotate(degrees) {
            drawLine(
                color = Color.White,
                start = Offset.Zero,
                end = Offset(size.width / 2, size.height / 2),
                strokeWidth = 2.dp.toPx(),
            )
        }
    }
}
To make things super easy, we’ll create a named composable for each corner, with the appropriate rotation:
@Composable fun One() = CornerLine(degrees = 0f)
@Composable fun Three() = CornerLine(degrees = -90f)
@Composable fun Seven() = CornerLine(degrees = -180f)
@Composable fun Nine() = CornerLine(degrees = -270f)
We’ll have to know which number is a prime, for this we’ll go with a very basic implementation.
fun Int.isPrime(): Boolean {
    if (this < 2) return false
    return (2 until this).none { this % it == 0 }
}
Have a shorter implementation for this that’s at least as correct for checking primes? Tweet it at me!
Now that we can check whether a number’s a prime and can draw lines into each corner, we can implement PrimeSquare trivially:
@Composable
fun PrimeSquare(offset: Int) {
    Box(
        Modifier
            .aspectRatio(1f)
            .padding(1.dp)
            .background(Color.DarkGray)
    ) {
        if ((offset + 1).isPrime()) One()
        if ((offset + 3).isPrime()) Three()
        if ((offset + 7).isPrime()) Seven()
        if ((offset + 9).isPrime()) Nine()
    }
}
Of course, the way we’re stacking Canvases here is not exactly optimal, but it’s a good demonstration of how a Box works as a container. If we moved the prime calculations a level lower, we could draw all our lines on a single Canvas for better performance – try doing this as a practice exercise.
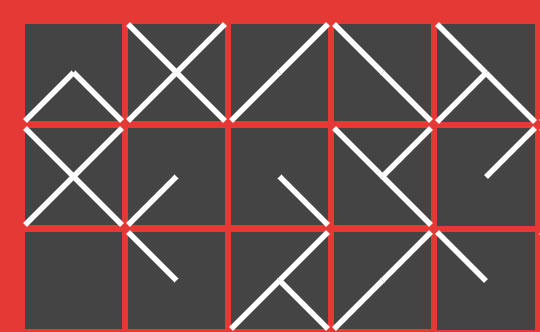
Still, our non-optimal implementation works well:
Final touches
There are two issues left here in our rendering, which you can spot if you look closely at the image above.
- The ends of the lines drawn extend beyond the grey boxes.
- The lines meeting in the middle don’t meet as expected.
For the first issue, we can make the Box in the PrimeSquare composable clip to its bounds:
Box(
    Modifier
        .aspectRatio(1f)
        .padding(1.dp)
        .background(Color.DarkGray)
        .clipToBounds()
) { ... }
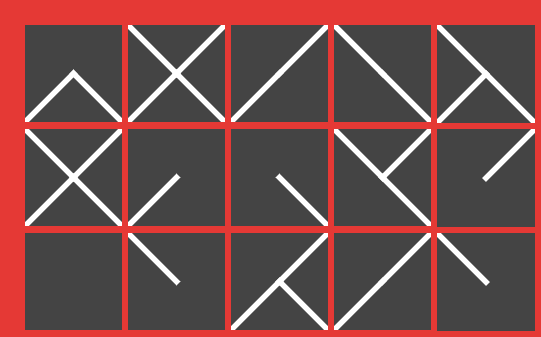
To make the lines overlap more in the middle, we can draw them just ever so slightly longer – 2f seems to do the trick:
end = Offset(size.width / 2 + 2f, size.height / 2 + 2f),
Running the app again gives us our final result.
Conclusion
Again, the completed source for this project is available on GitHub.
If you’re looking for more similar Compose content, check out these articles:
Another year over, a new one’s almost begun. Here’s a brief summary of what I’ve done in this one.
StateFlow behaves as a state holder and a Flow of values at the same time. Due to conflation, a collector of a StateFlow might not receive all values that it holds over time. This article covers what that means for your tests.
In another detailed Jetpack Compose walkthrough, we’ll look at implementing a simple app for practicing the digits of pi!
I started learning Jetpack Compose this week. Two days into that adventure, here’s a quick look at how a neat clock design can be built up in Compose, step-by-step.
