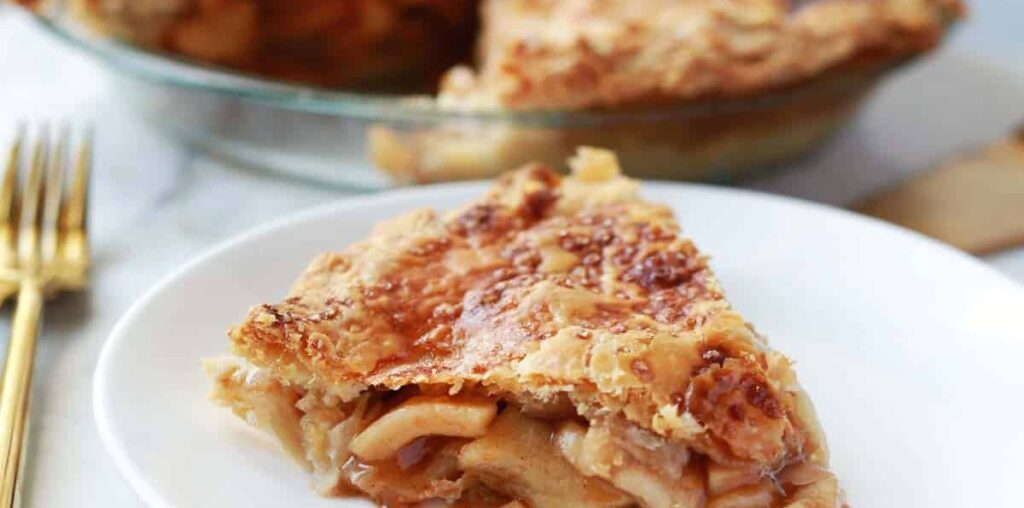
This is the best apple pie recipe IMO. As I type this post, the pie you see pictured is sitting half eaten in my refrigerator and it’s taking a lot of effort not to get up and go get another slice because it’s SO GOOD. But it’s 10:30 a.m. and I should probably wait at least until after lunch, right?
Why is this homemade apple pie so good? First, let’s start with the crust. It’s ultra flaky, all-butter crust that to me is the prefect ratio of thin by leaves enough chewy bits on the edges that you are excited to eat the entire slice. The filling is simple but flavorful with sour (Granny Smith) apples and plenty of cinnamon and brown sugar. This pie is not soggy but feel free to top it with a scoop of vanilla ice cream if you want to elevate it just a little more. But I personally love it all on it’s own—it’s just that good. It’s very much a classic dessert—just like grandma’s apple pie. This tastes like Thanksgiving to me.
Related: This recipe is a combination of my favorite pie crust recipe and homemade apple pie filling.


Ingredients
- Apples
- Brown sugar
- Butter
- Vanilla extract
- Cinnamon
- Cornstarch
- Water
- All-purpose flour
- Water
You may also want an egg for an egg wash to brush over the pie before baking. And I like to add a sprinkle of turbinado sugar, sometimes called sugar in the raw. But these are both optional additions, they simply elevate the look of the pie, giving it that golden brown top.


How to Make Apple Pie from Scratch
First, mix the pastry ingredients to make the crust. In a large bowl, add the flour and salt, stir to combine. Use a box grater to shred the cold butter. This is the secret to the best flaky pie crust! Add the cold butter to the flour mixture and mix together with your clean hands. The mixture will be crumbly, resembling small pebbles.
This should only take a couple minutes. Part of the goal is to touch/mix the pie crust dough the least amount possible, as this will result in the flakiest crust. Overworking the dough can make it gummy or crunchy like a giant cracker.
Add the ice water and again use your clean hands to mix until a dough ball forms. Press the dough together, you do not need to knead the dough. Divide in two and form small disks. Wrap in plastic wrap and refrigerate until you are ready to use.
Then make the filling. Peel and core the apples. Cut into small pieces. In a medium sauce pan, add the sugar, butter, vanilla extract and cinnamon. Cook over medium heat until melted. Add the apple slices to the pan and cook for 5 minutes until they begin to soften some.
In a small bowl or cup, stir together the cornstarch and water into a slurry. Pour this into the pan and continue to cook for 1-2 minutes. The liquid should begin to thicken.
Lightly flour your counter and rolling pin. Remove the dough from the refrigerator and unwrap from the plastic wrap. Use the rolling pin to press down and roll out the dough. If it sticks to the pin or counter, dust more flour onto these surfaces.
Once I have the bottom crust the size I need, I will gently roll it around my rolling pin and then transfer this over my prepared, meaning buttered, pie pan. Then unroll it from the pin.
Add the filling, cover with the top crust. Then crimp the edges. Pierce the center a few times with a sharp knife, this allows steam to escape as it bakes.
Cover the edges with aluminum foil or a pie shield. Bake at 400°F for 25 minutes. Remove the foil edges and reduce the oven temperate to 375°F. Bake for another 30 minutes.


Tips for Success
- Egg wash is simple an egg whisked with a couple teaspoons of water. You then brush this over the top of the pie before baking to give it that golden hue. If the egg wash pools in areas it can cause darker spots. But personally I don’t mind a little bit of this as I like the rustic look it gives a homemade pie.
- Excess dough? Use cookie cutters to make a few shapes or letters. You could make fall leaves or spell out something like “Apple Pie” to give your creation a fun Pinterest-worthy look. 🙂
- You can add more spices to the filling if you like—think nutmeg, allspice, or ginger.
- Place the pie pan on a baking sheet before putting in the oven. This will help catch any drips, plus it makes it easier to pull out of the oven with oven mitts on.
- Cool at least 30 minutes before slicing. This allows the filling to set up a little so it’s less liquid-y.
- You can store any apple pie leftovers covered in the refrigerator for at least 3 days.


More Great Pie Recipes
Frequently Asked Questions
What are the best apples to use in apple pie?
Granny Smith apples are the best variety to use in pie making as the sourness cuts against the sugar and gives it a complex flavor. That being said, any variety of apple can make a great pie. Feel free to use honeycrisp, pink lady, or golden delicious if you like.
What is a pie shield and why should I use one?
A pie shield is a ring-shaped tool that prevents the edges of your pie crust from burning while baking. You can make one from aluminum foil, but commercial pie shields can also be bought.
Do I have to blind bake the crust for apple pie?
No, this recipe does not require you to blind bake, or pre-bake, the crust. While some apple pie recipes may call for this, mine does not.


Get our FREE recipe guide with our most popular recipes of all time!


Free Popular Recipe Guide
Our top 25 recipes of all time!
Get the Recipe
This recipe makes one, double crust apple pie.
Instructions
-
First, make the pie crust dough. In a large bowl, add the flour and salt, stir to combine. Use a box grater to shred the cold butter. This is the secret to the best flaky pie crust! Add the cold butter to the flour mixture and mix together with your clean hands. The mixture will be crumbly, resembling small pebbles.
-
This should only take a couple minutes. Part of the goal is to touch/mix the pie crust dough the least amount possible, as this will result in the flakiest crust. Overworking the dough can make it gummy or crunchy like a giant cracker.
-
Add the ice water and again use your clean hands to mix until a dough ball forms. Press the dough together, you do not need to knead the dough. Divide in two and form small disks. Wrap in plastic wrap and refrigerate until you are ready to use.
-
Then make the filling. Peel and core the apples. Cut into small pieces. In a medium sauce pan, add the sugar, butter, vanilla extract and cinnamon. Cook over medium heat until melted. Add the apple pieces to the pan and cook for 5 minutes until they begin to soften some.
-
In a small bowl or cup, stir together the cornstarch and water into a slurry. Pour this into the pan and continue to cook for 1-2 minutes. The liquid should begin to thicken.
-
Lightly flour your counter and rolling pin. Remove the dough from the refrigerator and unwrap from the plastic wrap. Use the rolling pin to press down and roll out the dough. If it sticks to the pin or counter dust more flour onto these surfaces.
-
Once I have the pie crust dough the size I need, I will gently roll it around my rolling pin and then transfer this over my prepared, meaning buttered, pie pan. Then unroll it from the pin.
-
Add the filling, cover the top with the second rolled out dough and then crimp the edges. Pierce the center a few times with a sharp knife, this allows steam to escape as it bakes.
-
Cover the edges with aluminum foil or a pie shield. Bake at 400°F for 25 minutes. Remove the foil edges and reduce the oven temperate to 375°F. Bake for another 30 minutes.
Notes
Leftover pie dough? Use cookie cutters to make a few shapes or letters. You could make fall leaves or spell out something like “Apple Pie” to give your creation a fun Pinterest-worthy look. 🙂
Place the pie pan on a baking sheet before putting in the oven. This will help catch any drips, plus it makes it easier to pull out of the oven with oven mitts on.
Cool at least 30 minutes before slicing. This allows the filling to set up a little so it’s less liquid-y.
You can store any apple pie leftovers covered in the refrigerator for at least 3 days.
Nutrition
Nutrition Facts
Apple Pie Recipe
Amount per Serving
% Daily Value*
* Percent Daily Values are based on a 2000 calorie diet.
Notice: Nutrition is auto-calculated, using Spoonacular, for your convenience. Where relevant, we recommend using your own nutrition calculations.


