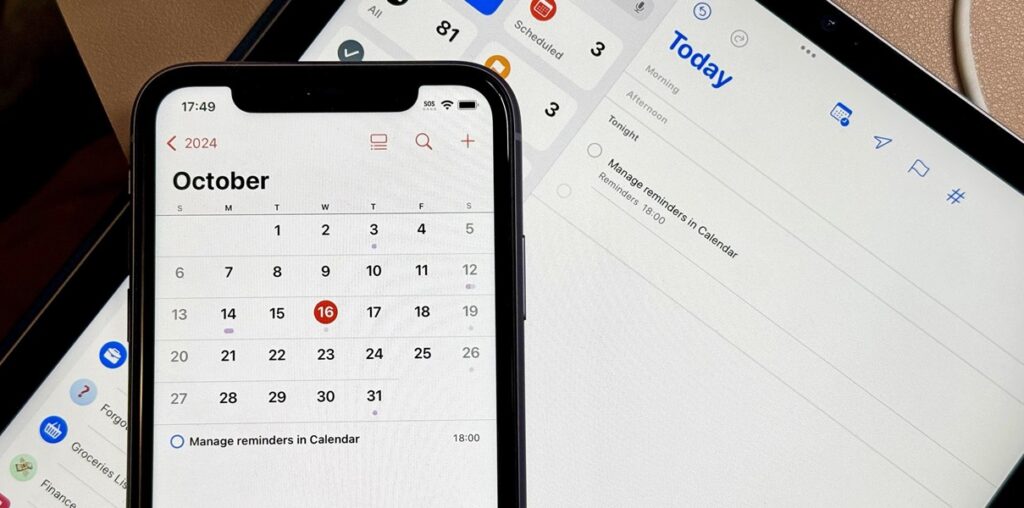
Multitasking often seems like a good idea until you find yourself exhausted from all the back and forth between apps. In the latest software updates for iPhone, iPad, and Mac, Apple has streamlined the process for its Calendar and Reminders apps — making it easy to create and manage both calendar events and tasks from a single location.
In the iOS 18, iPadOS 18, and macOS Sequoia 15 updates, first released on Sept. 16, Apple has given the Calendar app Reminders integration. You can continue to use both apps as before, but you can also opt to just use Calendar when it comes to managing events and to-dos, which provides an excellent overview of all your appointments, meetings, and reminders.
In Calendar, you can create new reminders, edit every aspect of them, mark them as complete or incomplete, quickly view them in the Reminders app, and more. Let’s see how it all works.
Create Reminders in Calendar on iPhone and iPad
In the Calendar app, whether in landscape or portrait orientation, tap the plus (+) button or touch and hold the date or time of day in a calendar view to start a new event. Next, tap the “Reminder” tab to switch from creating a new event.
If you don’t see the “Reminder” option, you may have locked the Reminders app behind Face ID, Touch ID, or passcode protection, which you will need to disable. Or you may have the “Scheduled Reminders” calendar toggled off in your calendars list, which you must enable.

Then, it works just like it does in the Reminders app. You give the reminder a title, change its list if necessary (it uses your default list automatically), and adjust the date and time. Then, you can add or change other things, such as notes, repeat status, early reminders, tags, location, messaging notifications, assignees, flags, priorities, images, URLs, etc.
If you started from a long-press on the date or in the “All-Day” section of the Day or Week view, a specific time won’t be automatically specified. However, if you use the plus (+) button or long-press on a particular time in the Day or Week view, the time will be automatically set to the selected time or the next hour.
Once your reminder is ready, tap “Add” to save it.

The reminder will appear in both the Calendar and Reminders apps. In Calendar, reminders are distinguished from events in the Day, Week, and Month views using an open checklist bullet. You can tap the open bullet to mark the reminder as complete. If the reminder repeats, future instances are dimmed until the most current one is marked as completed. Completed reminders are also dimmed.
Tap a reminder to view its details, where you can edit information, mark it as complete or incomplete, show the task in Reminders, or delete it. You can also long-press a reminder in certain calendar views to open the contextual menu and then mark the task as complete or incomplete, open it in Reminders, or delete it. You can view deleted reminders for up to 30 days in the Recently Deleted list in the Reminders app.

If you no longer want to create or see reminders in Calendar, open your calendars list and toggle off “Scheduled Reminders” under “Other.” Doing so will not delete any tasks in the Reminders app.
Create Reminders in Calendar on a Mac
Click the plus (+) button in the Calendar app to start a new event. You can also go to File » New Event or Reminder in the menu bar, double-click a spot on the calendar, or right-click a place on the calendar and choose “New Reminder.” If you’re not already in the new Reminder window, click “New Reminder” or switch to the “Reminder” tab.

Then, it works just like it does in the Reminders app. You give the reminder a title, change its list if necessary (it uses your default list automatically), and adjust the date and time. Then, you can add or change other things, such as notes, repeat status, early reminders, tags, location, messaging notifications, flags, priorities, images, URLs, etc.
Depending on how you started the reminder and from what view, the time will either be automatically selected or labeled as an all-day reminder.
Once your reminder is ready, click away or hit Return to save it.

The reminder will appear in both the Calendar and Reminders apps. In Calendar, reminders are distinguished from events in the Day, Week, and Month views using an open checklist bullet. You can click the open bullet to mark the reminder as complete. If the reminder repeats, future instances are dimmed until the most current one is marked as completed. Completed reminders are also dimmed.
Click, force-click, or double-click on a reminder to view its details (depending on your view), where you can edit information, mark it as complete or incomplete, or delete it. You can also right-click a reminder in certain calendar views to open the contextual menu and then mark the task as complete or incomplete, open its details, or delete it. You can view deleted reminders for up to 30 days in the Recently Deleted list in the Reminders app.
If you no longer want to see reminders in Calendar, uncheck the “Scheduled Reminders” calendar under “Other” in your calendars list. Doing so will not delete any tasks in the Reminders app.
Just updated your iPhone? You’ll find new features for TV, Messages, News, and Shortcuts, as well as important bug fixes and security patches. Find out what’s new and changed on your iPhone with the iOS 17.6 update.

